

Creating an Agent
- Navigate to Agent Hub → Agents
- Click Create Agent
- Configure the agent’s identity:
- Agent name — a descriptive name (e.g., “Guest Support Agent”, “Owner Communication”)
- Active status — toggle to activate or deactivate the agent
Agent Configuration Tabs
Each agent has 6 configuration tabs:
Navigate to Agent Hub → Agents to manage your AI agents: https://app.cendra.ai/agents
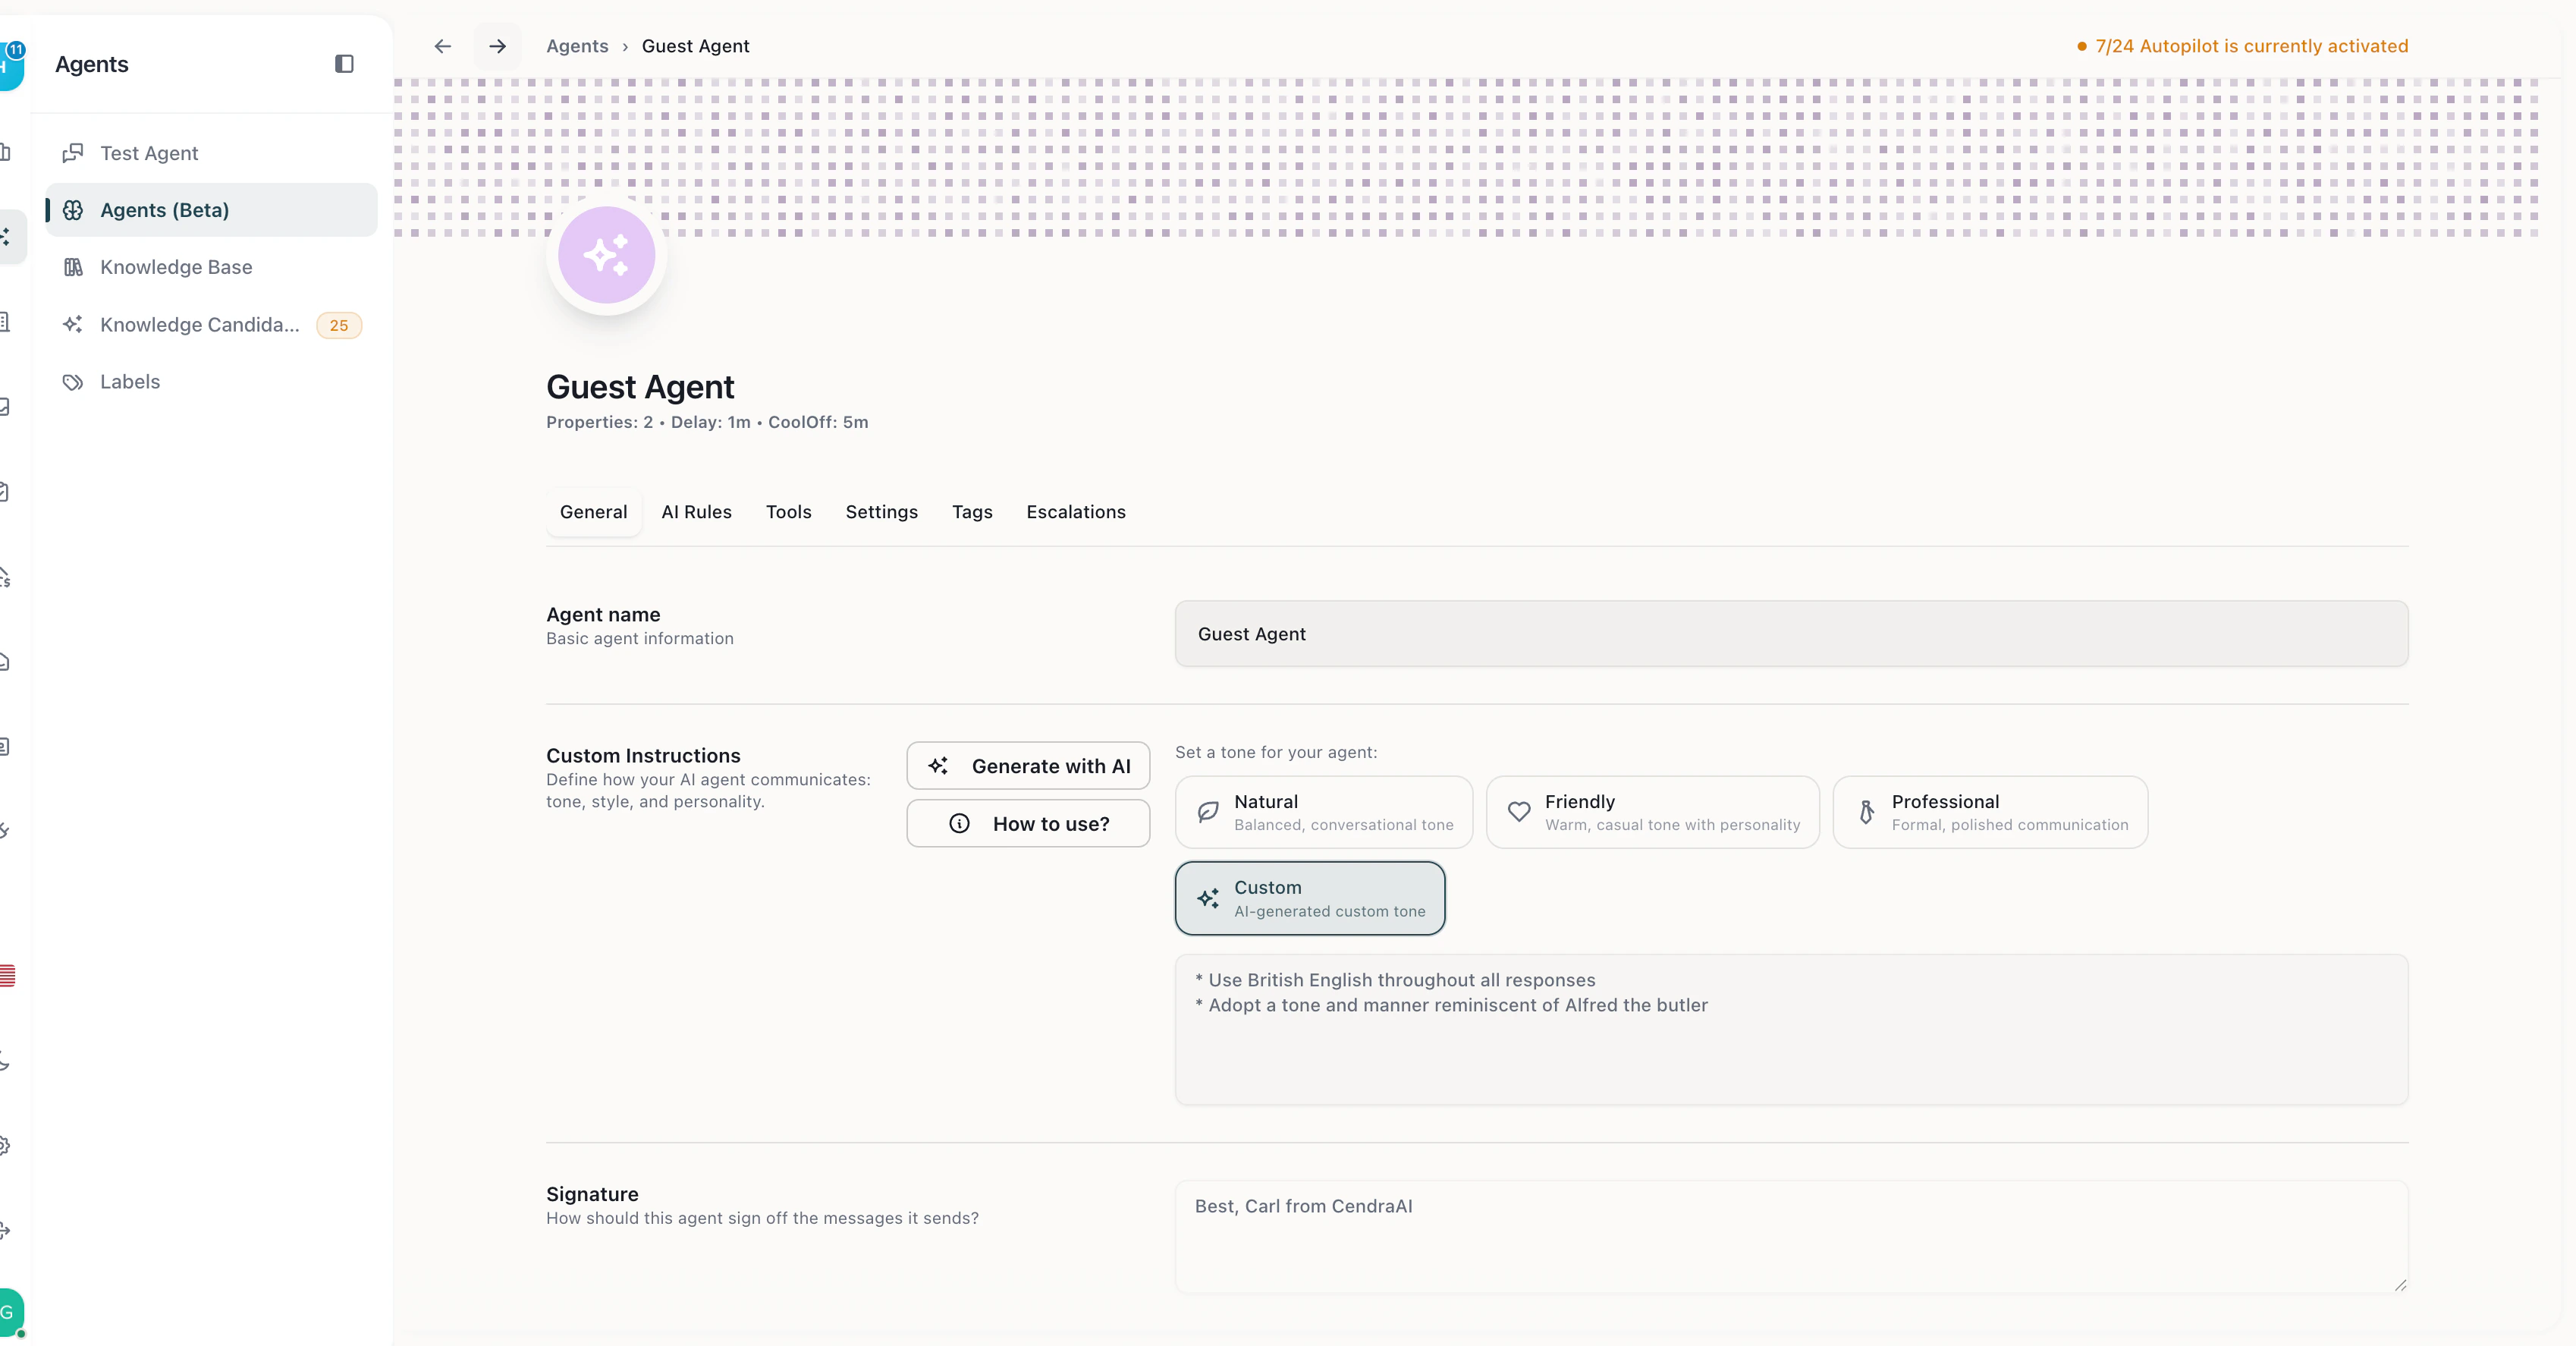
Agent Hub — General tab with agent name, custom instructions, tone selection, and signature
General
Custom Instructions
Define how your AI agent should behave — its personality, communication style, and constraints. This is a free-text field where you describe what the agent should do and how.Tone Selection
Choose from 8 built-in tone templates:
You can also create a custom tone by describing your preferred style and adding extra instructions.
Signature
Append a custom signature to every AI-generated message — useful for branding or compliance.Tools
Response Language
Choose from 90+ languages for AI responses. Options include:- Match Customer Language (default) — AI responds in whatever language the guest writes in
- Any specific language — English, Spanish, French, German, Arabic, Chinese, Japanese, Turkish, Portuguese, and 80+ more
AI Capabilities
Toggle these features on or off per agent:Auto Mark as Done
When enabled, Cendra automatically marks conversations as resolved after the AI responds successfully.Settings
Working Mode
Control when and how the AI responds:Response Timing
Fine-tune response behavior:- Response delay — 0 to 10 minutes before the AI responds (makes responses feel more natural)
- Cool-off period — minimum wait time between consecutive AI messages (0 to 10 minutes)
Timezone
- Match Property Timezone (default) — AI uses each property’s timezone for scheduling
- Manual selection — choose from 500+ IANA timezones